I love spinning silk. I especially enjoy spinning hand painted silk top. There is something very soothing about spinning silk. And I really love watching the movement of color in a well painted silk top.
Here’s how I prepare a hand painted silk top for spinning.
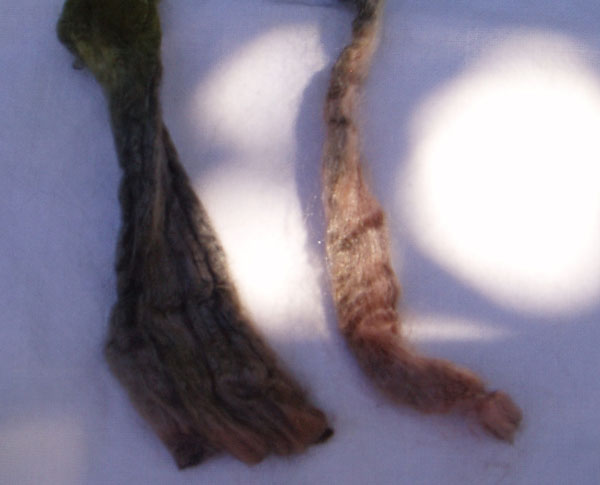
 This is hand painted silk top from Earthues. The silk top is somewhat matted in appearance and texture. Not unlike paper that had been wetted, wrung out, and left to dry in the wrung out state. Silk top in this state is not easy to spin.
I’ve often referred to my own hand painted silk top a “drowned cat” because that’s what my Ellie looks like when she gets out of a bath. This painted top from Earthues looks much better than ones that just came out of my own drying rack, so it’s likely to have been neatened up somewhat. But it still needs a little preparation before it can be spun.
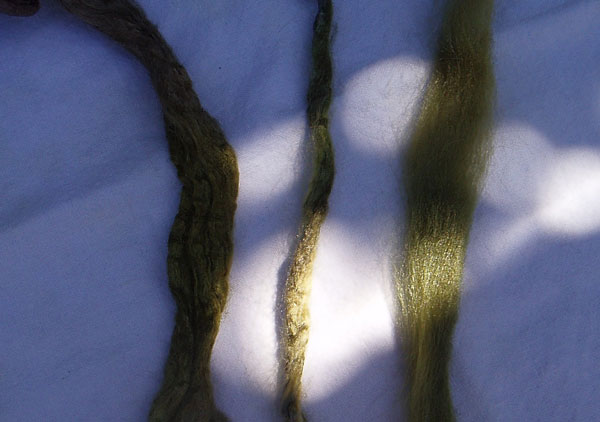
 Strip the silk top along the full length.
I like to just shake the top a little bit before I start stripping it. Once shaken, you’ll start to see the natural breaks in the top. This is where the top wants to pull apart into smaller strips. I strip it in half first, if I will be making a 2 ply yarn. Then I take one of these “breaks” and start stripping a thin strip along the full length of the top. I like these strips to be about pencil or little finger width.
Note: How thin your strips are is completely dependent on how thin/thick you want the final yarn to be and how long/short the color repeats you want to have. I generally spin my silk to be lace weight, so I strip it down fairly thin so the repeats don’t go on forever. If I am going to chain ply the yarn, then I may have wider strips because that will also shorten my color repeats.
 Lightly draft the strip.From left to right: the full top, a single strip from the top, and lightly drafted top.
Start from one end and hold the strip of silk between your hands, about 3-4″ apart (just shy of fiber length). Lightly snap the silk between your hands. You’ll see the silk between your hands open up. Move down the strip and repeat until you’ve fluffed up the entire length of the strip.
You’ll notice the shift of color from the original top, which is more intense, to a softer color in the drafted strip. The original top is closer to real color of the spun yarn because you’ll be compressing the fiber again, thereby intensifying the color.
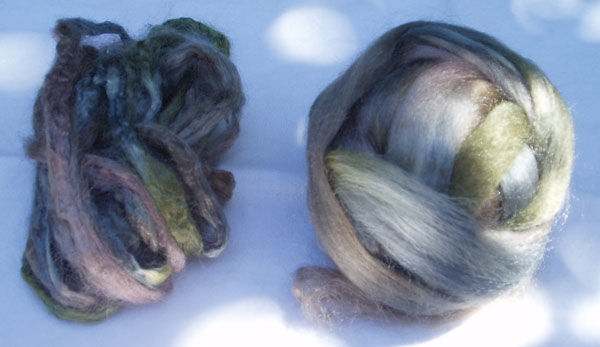 Left: Silk top (unstripped)
Right: Stripped and lightly drafted top.
The pile of silk top on the left will be stripped down and drafted into at least 4 more of the drafted balls of silk like the one on the right. This will represent 1/2 of the original top. See how much the fiber fluffs up?
Amazing, isn’t it? I’m always fascinated by this transformation. I can do this all day. But then, I’m easily amused.