Random thoughts of a fiber enthusiast - mostly fiber related, sometimes coherent

Category: Felt Page 1 of 2

Hummingbird

I know, 2 posts in a row. Please pull yourself off the floor. I have some backlog waiting for photo editing and text. We will resume to normal non-posting schedule shortly.

Hummingbird_2
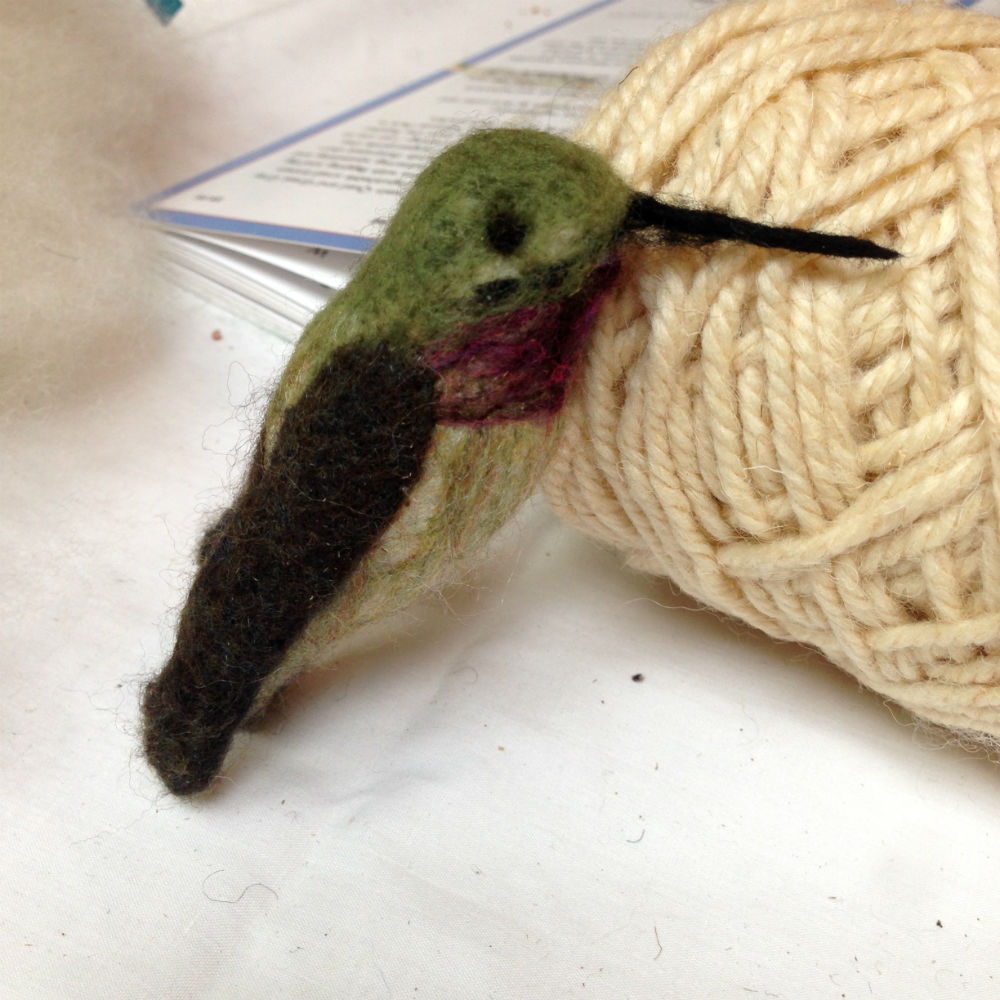
Our felting group worked on needle felting small birds this month. We all decided to work on hummingbirds, because they were small. Ha! Small doesn’t mean a light on details! I think an owl would have been faster.

No in progress photos, unfortunately. What you see is 100% wool.

The inner core was some unknown wool batt that Ginger had on hand. I rolled that into a cylinder and started to prick the heck out of it to make a very small dense core in the rough shape of a hummingbird body.

Hummingbird_3I took a small amount of black wool and wrapped that around a toothpick to make the beak. I then gently pulled it off the toothpick and wet felted it into shape. I was too worried about my fingers to try needle felting something that small.

Then, I covered the body with scrap wool from my various spinning classes. Most of it were from Ashland Bay, I believe. The throat was a mix of black, pink and purple blended with my fingers.

The wings were roughly shaped separately before felting into the body. It still need a bit of trimming to shape. I also need to decide on what type of feet to attach and how to perch the bird.

Believe it or not, the hummingbird is fairly true to size (length) and weight of an Anna. So happy with this.

Unfortunately, I found the little bird next to Stormy’s food bowl yesterday. I am not sure how she got it off of the high shelf it was on but she thinks its a cat toy. I need to clean it off a bit — get rid of the cat hair. Sigh.

New Slippers

I have really been enjoying the monthly guild felting group. This month, we decided to make slippers. Good thing too, since my favorite wool Haflinger slippers gave up the ghost a while ago. I had the felt insert replaced but it was beyond hope when I wore through the toe. It had a good 20 year run. I should be happy. My replacement Acorn slippers, sadly, did not last nearly as long.

SlippersForm

Here’s what a couple of hours of work look like. The green plastic underneath is the form I worked from. The trick to removing the form is to cut a slit that is large enough to pull the form out, but not too big since the hole will enlarge as you continue the felting process. I should also add that you need to make the slit large enough to easily put your hand in and turn it inside out as you complete the felting process. That’s why there is such a funky dog ear at the heel because I had to cut again after fighting it for a while.

I did the final fulling with the slippers on my foot so there is a definite right and left slipper. I got a nice self foot massage in the process. Bonus!

SlippersTrimmed

Here it is after I trimmed it once it is fully dried. As you can see, the edge where I trimmed was much fluffier than the edges that did not need trimming. This is because the edge was felted down and the body was less felted down. I want to weave a tape to cover up the cut edge to hide the inconsistent width.

The finished slippers weigh less than 2 oz. Yes, less than 2 oz of wool. I plan to wear these at the loom this winter. I don’t want to worry about wearing through the sole so I will sew on a few pieces of leather on the bottom.

Hopefully, the leather will add more weight to these slippers. Why? They are light enough each that Stormy thinks they are part of her toy collection and she carries them around. Each morning, I find them in a different part of the house than where I place them the night before.

20150713

An ICAD based on one of the slippers.

More Felting

A group of us got together and held a mini felting group. Our first meeting was on Friday afternoon. After some show and tell and discussions, I decided to roll up my figurative sleeves and make a piece of felt for a book cover from the CNCH 2014’s Return to Sender that I never spun up.

Felt_FrontGinger was nice enough to provide a batt of some unknown wool as my core. On the front, I layered on the brown, teal, and pink. We then stretched 2 silk hankies over the entire face before I squiggled on some handpainted iIelandic singles/finger roving.

Felt_BackOn the back, I layered on the chartreuse. There really wasn’t enough of it to get good coverage.

I think the original unfelted dimension was around 18-20″x30-36″. The finished dimension is 13″x24″. Much larger than I wanted. Next time, I won’t be so lackadaisical about just grabbing something and just DO it. A little more planning might have served me well here. But, it was a last minute decision and I’m glad to have done it. Otherwise, this roving would have sat stagnant in my stash forever.

Page 1 of 2

Powered by WordPress & Theme by Anders Norén