

This is my dye notebook from the natural dye workshop that we did in Italy. Pretty, isn’t it? It’s amazing the range of colors we got from just an hour or so of plant collections. Except for madder and cochineal, everything was collected on the property. Well, and olive leaves. Ildiko wasn’t sure if Gianni had already pruned his olives or not, so she grabbed some olive branches from her place. But we could have collected from the property, if we chose.
And for those of you who think that the color is off on the right side photo, let me assure you that it really is less saturated than the left. Different fabrics take up dye differently.
 Wait. Let’s back up. Here’s Ildiko. Master dyer extraordinaire. She lives somewhere south of Perugia, and came up to give us a 2 day natural dye workshop.
Upon start of the first day, she took us for a walk along the driveway and talked to us about plant collections, seasons, time of day, etc. As we walked, we collected the plants that were appropriate for the season, or at least, close to the season, since spring is late this year in Italy. The bonus? Poppies are at their peak while we were there. In a normal year, we would have missed it.
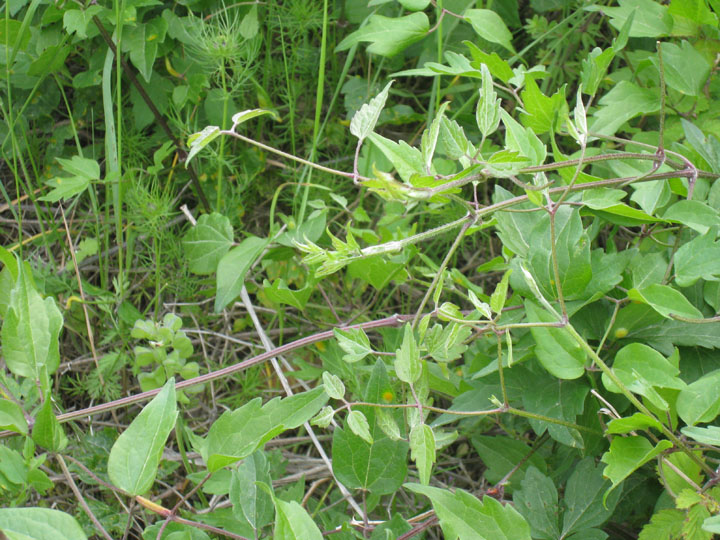
So, what did we collect? Apple, walnut, olive and poplar leaves; poppy blossoms; and something she called vita alba. I haven’t figured out what vita alba is yet, or even if I’m spelling it correctly. It is some sort of soft vine. The closest I can figure out is that it’s similar to morning glory. But since it wasn’t in bloom, I couldn’t tell. (For those botanists or garden enthusiasts, you can see a photo of it here.) We only picked the soft tips — the new growth.
We also talked about the other plant materials available: scotch broom — it wasn’t in bloom yet, but the blossoms, when using a copper modifier, produce a nice light yellow. Less stem, the purer the color will be. (Yes, Grace, we all dosed up on our allergy meds and nose sprays.) The leaves from the Sambuco tree, or European Elderberry, produces a beautiful violet, but it’s not a stable color (not colorfast). Yellows tend to be weak colors, and will fade over time. This is the reason that many old tapestries have blue where green should have been. The yellows have faded out over the course of the years, decades, centuries.
So, you want to know how this is done? The following is a series of steps to follow.
1. Collect plant material.
You can use both dry or fresh plant material. You will need more fresh material than dried, but the color will be more luminescent and brilliant than the dry material will produce.

The above photo shows us collecting poppy blossoms in the field below the house. We just the blossoms, so we beheaded 1 kilo worth of poppies.

And, here, Ildiko is showing us how to strip the leaves off of the olive branches. So, be forewarned — any olive branch I’m likely to offer will have all the leaves stripped off of it. It makes a beautiful yellow gold.
2. Soak the plant materials for a few hours for soft plant materials (poppy blossoms, vita alba, very fresh young leaves), or overnight for tougher plant materials (mature tree leaves, branches).


L: poppy blossom.
R: (from left to right) poplar leaves, vita alba, olive leaves.
3. Premordant your fiber.
We used alum as our primary mordant. Cotton requires a second mordant — tannic acid. We use powdered oak galls (tannic acid) for this step. You could use oak galls, but the powder will provide you with more precise control.
4. Simmer the plant material in the soak water. The soaking will already have started breaking down the cellular structure, thus releasing the dye, but simmering it will move the process right along and extract all the remaining dye material.

How long? Again, it depends on the plant material. For the poppies (above), we simmered it for 45 minutes, but typically, you would simmer for 2 hours or so.
5. Strain the dye liquid. You don’t really want the plant materials sticking to your fiber, do you? (Well, you could if you want to fast track for a test batch for new plant material that you just happen to have collected while you were out walking the dog. You know, helping your neighbors prune that plant. Cough. Cough. Honest, Penny, I wouldn’t do that to your garden.)

Here’s Ildiko and Toni straining out the olive leaves. You can dump the used plant material in your compost pile, if you wish. There is nothing in there except water and plant material.
As for straining devices. Cheap colanders from yard sales. If you want to be really particular, use cheese cloth, but it’s really not necessary. And if the dye material is even remotely acidic, don’t use anything that might react to the acid and thus throw your color off.
Me? I had Martin make me a strainer from a 3 gallon paint bucket (unused) from the hardware store by drilling lots and lots of holes in it. This way, I can nest it in a 5 gallon paint bucket, and pour my liquid in.
6. Simmer your fiber in the dye liquid.
How hot? It depends on your fiber. If you are dyeing silk, don’t go above 70C (or 158F). You will damage the silk protein above that temperature. But generally, you want a low simmer (about 50C, or 120F) for about 2 hours. (For the poppies, we only simmered the fiber for 45 minutes because the dye is so delicate.)

Toni checking on the fiber in olive bath.
Also, for madder, the temperature is crucial. As long as it stays below 80C, it will produce a beautiful deep red. But if it goes above 80C, it will turn to a brick red — orange tones will appear.
7. Rinse and dry your fiber.
If you are dyeing wool, be careful that you don’t shock the fiber. Put the fiber in same temperature rinse water, and gradually cool it down. Of course, if you aren’t trying to do everything, including reusing the same dye pots, drying the fiber and putting samples in your dye notebook, you could just let the fiber cool in the dye bath overnight.
 This is the page for the poppy. (Click to see larger picture.) I’m having problems showing the true colors, even with Photoshop. I’ll have to keep working at it, but there is a green cast, as well as a red cast to this. The silk is a beautiful blue grey with red tones. The wool is a pale soft green with some blue tones. The alpaca is pale pale blue, and the sheep wool is greenish yellow.
There are 2 samples of silk and wool. The smaller sample on top is because after the 1st batch, we realized that we still had a lot of dye in the dye bath, and decided to throw some more fiber in for a second bath. As you can see, the 2nd batch is similar, but the color is just “less” all the way around. There is less red tones to the silk, so I think the red exhausted much faster. I also think the the red “struck” fast on the silk. Would the wool get more blue tones if we let it simmer longer than 45 minutes? I don’t know. Maybe.
The reason that it didn’t exhaust the first time was likely due to the fact that we didn’t use a full 4:1 weight of fiber (wof) ratio. It was probably closer to 6:1 or higher.
Oh, and I want to return and take another class with Ildiko in the fall (maybe 2009, to spread the costs out a bit). Different plant materials will be available then. We also talked about how you can produce a whole series of like colors from a single plant (e.g. walnut), based on the season that you collected the plant material, the part used (fresh leaves, bark, nuts), the fiber, and the temperature at which you simmered the fiber at. Can’t you see it now?
My head is still spinning with ideas. Last night, one of the ladies that I play cards with each week says that her yard is going crazy. She can’t keep up with all the new growth. I offered my services…Can you say “fresh dye material”?
Incidentally, I wonder if California Poppies will produce the same colors?
SOP Summary:
- soak plant material overnight; mordant your fiber
- simmer plant material @ 50C for 2 hours
- strain and add fiber
- simmer in dye bath @ 50C for 2 hours

 Look what was in my mailbox when I returned from the South Pacific?


