Random thoughts of a fiber enthusiast - mostly fiber related, sometimes coherent

Category: Technique Page 5 of 8

Que Sera

Or, Don’t Sweat the Small Stuff.

I don’t know if it’s experience or laziness, but I’m finding that I’m less and less willing to rip out mistakes without taking a good hard look at the work before making the decision to rip.

When working short-row heels, sometimes I get uneven number of stitches remaining unworked on either side.  I used to laboriously tink back to the start of the problem, if I can find it.  If not, tink back to the start of the heel.  Now?  I just let it be.  I realized that nobody will notice the off by one count, and it doesn’t affect the fit.  So, why bother?  (If it’s more than one off, I will likely tink back.)

When working heels in general, sometimes I will pick up an extra 1 or 2 stitches along each side to eliminate the gap.  Who cares if the pattern says pick up x stitches?  If x stitches cause a hole to happen, why not pick up x+1? You just need to do an extra set of decreases to get back down to the appropriate number.  Believe me, that will be less noticeable than the hole.  (Okay, this example is the inverse of the original premise of laziness.)

In my entrelac sampler from Kathryn Alexander’s class, there were a few squares that weren’t “square.”  For some reason, instead of picking up y stitches, I picked up z because z seemed to be what was called for.  After working the “square” it’s barely noticeable.

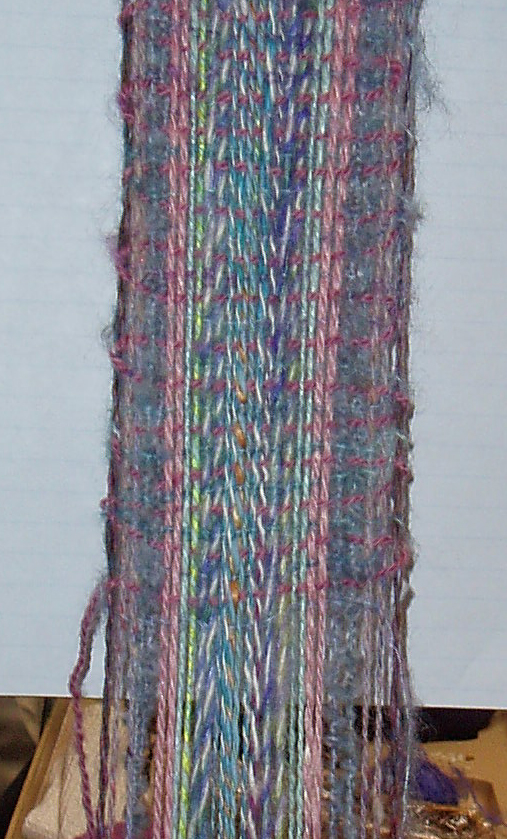
The other day, I was finishing off the triangle shawl I “designed” during Evelyn Clark’s “Designing Lace Triangles” class.  It was a sampler of all the stock lace patterns in the book.  When it was time to start the edging, I realized that I was short 2 stitches in the pattern repeat on either side of the center.  Even under careful scrutiny, I couldn’t figure out where I went wrong.  I don’t like to tink or rip unless I know exactly what I’m trying to fix and how far back it is.  So, what did I do?  Willy nilly picking up of the extra stitches would have been noticeable and unsightly.  So, in the first row of the edging, I just didn’t do the 3-1 decrease on that last pattern repeat.  Voila!  I now have the right number of stitches.  You can’t see the mistake unless you really look for it.

Sleeve increases/decreases.  You know those “increase every 6th row” instructions, and you lose track somewhere between rows 4 and 7.  Occasional slip ups can be made up in the following row.  Really.  It can.  Decrease or increase in the next row.  Honest.  Unless you point it out, chances are that no one will notice.

So, unless the mistakes are structural, I may decide not to fix the mistake.  I make that call as I go along.  This isn’t to say that 20 rows past my decision point, I won’t change my mind again and decide that the mistake really needs to come out.

Right, wrong, laziness or experience.  Call it what you will.  But I will say that experience plays a large part of it.  Only experience will tell me what I can and cannot get away with.  And if I’m wrong, well, it’s more experience, right?

Either all that or I’ve finally learned to ease off a bit on my OC tendencies.

Samples? We Don’t Need No Stinkin’ Samples!

I hate sampling more than I hate swatching? Why? Because swatching is part of sampling, if your end product is to be knitted. Throw a scenario at me, and I can guarantee you that I can come back with a good reason why the sample or the swatch won’t help you in the end.

My favorite excuses, er, justifications?

  1. I only bought x ounces of this fiber. If I make a sample, I won’t have enough for my final project. (Even if I don’t have a project in mind. Or especially if I don’t have a project in mind — what if I need that extra 2 yards of yarn?)
  2. This is hand painted fiber. To get a true representation of how the colors interact in various spinning and knitting methods, a sample won’t capture all the colors and the effects of the repeats.
  3. This is hand painted yarn (whether spun from #2 or started out as hand painted yarn. Again, a small swatch won’t be reflective of the whole piece. You need the juxtaposition of the colors in a finished garment to get the full effect. A 5″ swatch is going to tell you diddly about how the finished garment will look. You need something more like at 10″x10″ or larger. Does the color pooling make me look fat? (Don’t ask your partner that question if you don’t want to hear the answer. Of course, Martin always knew to flee the room what that starts up.)  So, just cast on! and knit your garment.  Oh, and be prepared to rip and change your plan if you don’t like how the colors are working out.
  4. And the best? I have no idea what I want to do with this resulting yarn. I just want to spin. Don’t distract me with the technical stuff. Of course, I usually have an idea of what I’m going to make with a fiber, since the amount of the fiber will determine the size of the garment (hat, socks, scarf/shawl, sweater), and I will spin to the approximate weight.

Having said all of the above, I will also say that I’ve been burned, scarred, even, by not sampling/swatching. For larger projects (where I have a pound of wool or so), I will play out a few different spinning and plying methods: long or short draw? 2 or 3 ply? Or cabled? What wpi do I want? I’ll spin a yard or so of each and mount part of it on a card in both single and plied form. Fondle the rest of the length for the hand of the yarn. Is it too lofty? Not enough loft? Will it pill? Is it too dense and therefore, make too heavy a garment?

Once I have it down to the final 2 or so, I will spin about 10-20 more yards of my top pick. I’ll knit up a small sample. How’s the drape? How well does it show stitch definition (for cables). What’s the gauge? Do I really want to knit a whole sweater at 30 st/4 inches?

If the first spinning sample doesn’t work, I’ll either vary the sample a bit toward what I want, or move on to the second sample if I think the original is not salvageable.

I then try, really, really hard, to keep my chosen sample card with the unspun fiber as a reference. But one of several things happen:

  1. Because I don’t always start spinning the rest of the fiber immediately, I lose the sample card before actually start spinning the fiber, so all that sampling is lost.
  2. Same excuse as the 1st, but instead of losing the sample card, I decide on a different project.
  3. I spun the fiber, but I lost the sample card before I start knitting (it’s been sitting in my yarn stash for a year or 4), and I can’t remember what I wanted to do with this fiber.

Yeah, you guessed it. I end up just winging it a lot.

Easy Twill

Twill

This is Nancy’s scarf from the CNCH workshop. (click picture to see closeup). I want to highlight the twill effect that she has going on here.

Would you believe that this is just plain weave? She achieved the twill effect by alternating S and Z plied yarns in her warp. The effect was exaggerated by plying 2 different color singles together into a single yarn.

Really, that’s all it was. It is brilliant. I see more experiments coming up. We spinners have a lot more opportunities to control our end products by creating yarns for a specific effect.

The brown threads on the edges, I was told, are floating selvages. I sort of understand what they are, but I will have to actually try it out on some samplers before I really understand it.

Correction: This post should have read “Easy Herringbone”, not Twill. Although Herringbone is a twill, the effect Nancy achieved here is Herringbone. It bugged the heck out of me all morning, and I just had to correct it. I may still have it incorrect, but at least I’ll sleep better tonight.

Page 5 of 8

Powered by WordPress & Theme by Anders Norén